Most teams add customers in two ways: bring a list in from another tool, or walk through the built-in flow one person at a time. This page is about that second path—creating a client, their pool, and who services it—so schedules and routes stay accurate from day one.
If you're moving data in bulk instead, Aquatechy supports three import styles (each has its own quirks and file format):
- CSV import — Spreadsheet using our template; in the app use
/clients/import-csv. - Skimmer import — Excel export from Skimmer (
/clients/import-skimmer); plan to clean duplicates and add assignments afterward, since Skimmer doesn't carry scheduling into Aquatechy. - QuickBooks import — From your QuickBooks file (
/clients/import-quickbooks).
You'll also find those entries under Clients in the sidebar (same names as in the app: CSV Import, Skimmer Import, QuickBooks Import). Use the dedicated guides for file prep and mapping when we publish them; here we stay on New Client at /clients/new, or the New Client button on My Clients (/clients).
You need at least one company before this screen opens fully—if none exist, Aquatechy will point you to create one first.
The three steps (Client → Pool → Assignments)
The form is a stepper with three tabs: Client, Pool, and Assignments. You move with Next and Previous until the last step, where you finish with Add client.
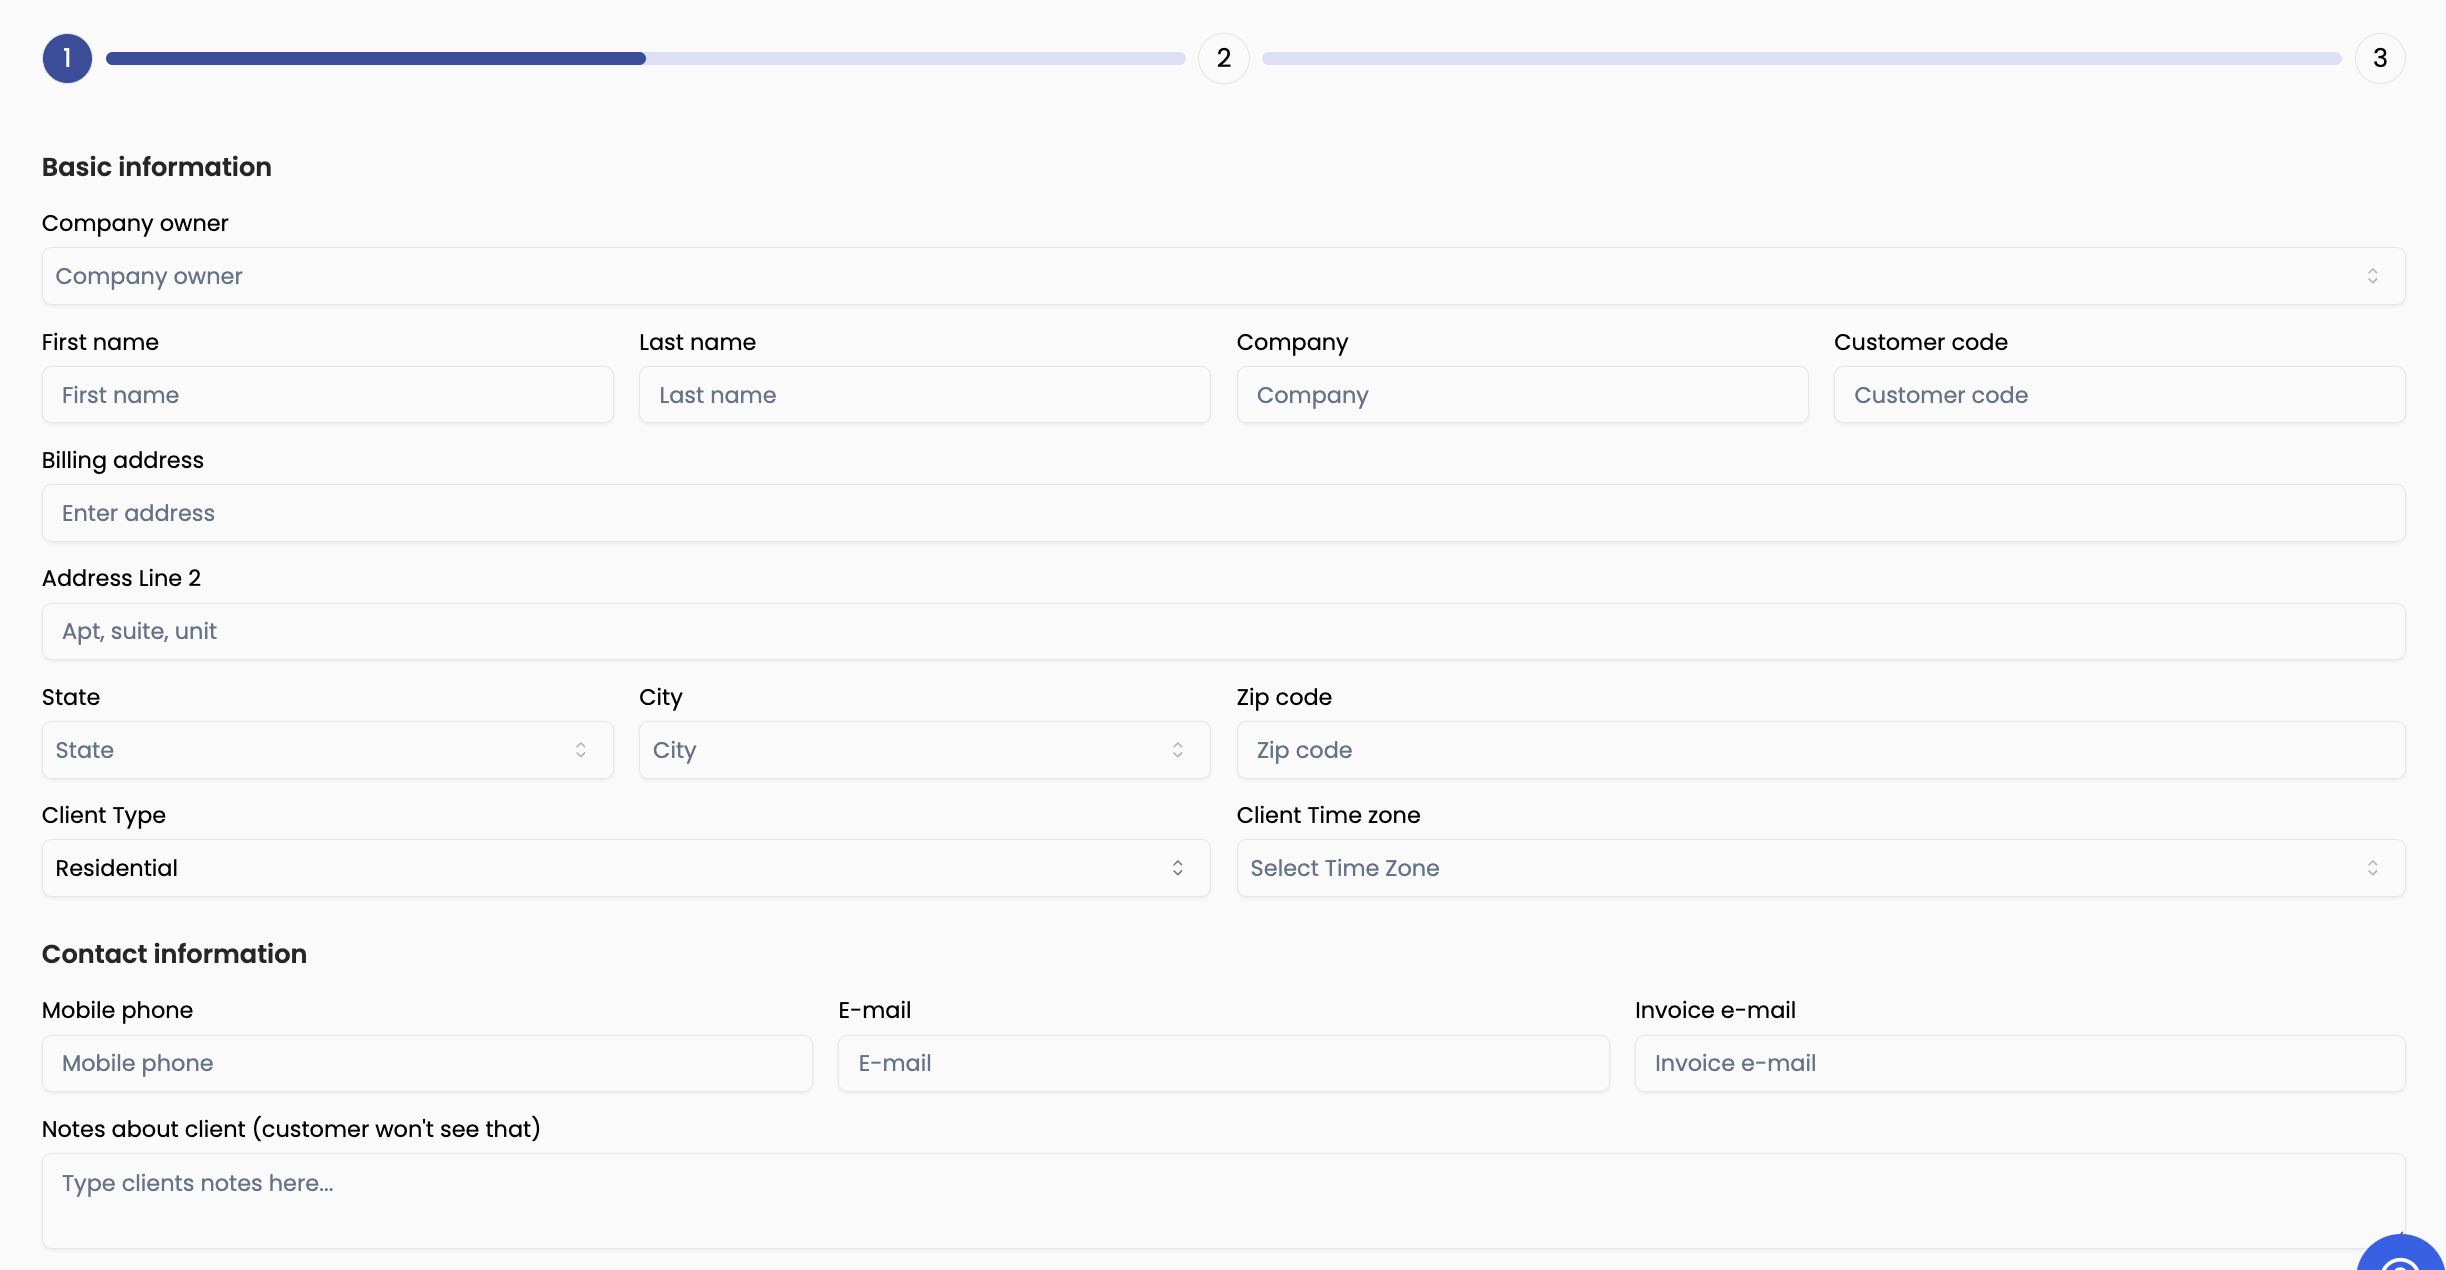
1 — Client
This is Basic information and Contact information. You choose which Company owner the customer belongs to (if you only have one company, it may already be selected). You add name fields (First name, Last name), optional Company and Customer code, then the Billing address and related city, state, zip, and Client Time zone. Client Type is Residential or Commercial. Under contacts you'll see Mobile phone, E-mail, Invoice e-mail, and Notes about client—use notes for things your team should see that the customer might not.
When the step validates, hit Next.
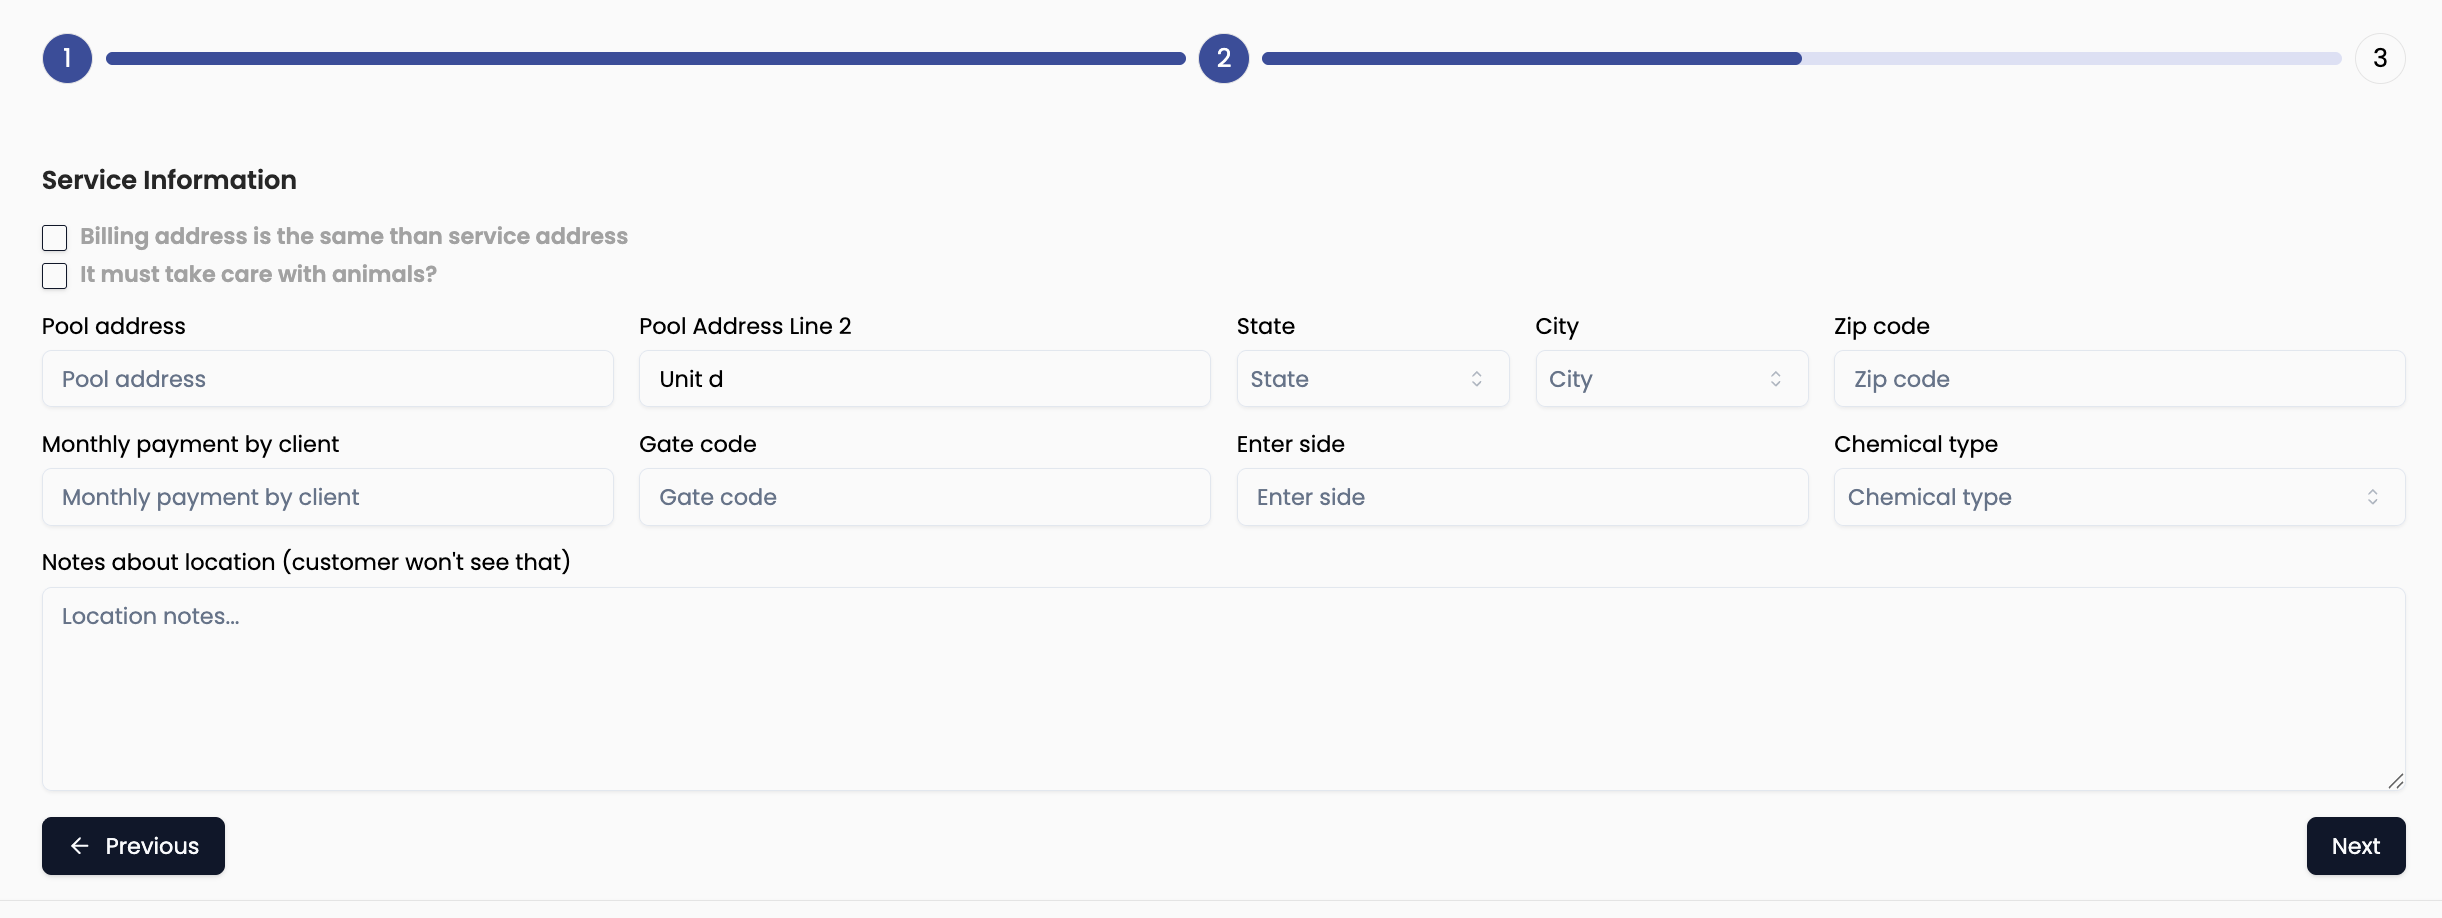
2 — Pool
The heading here is Service Information. You decide if the pool sits at the same place as billing (Billing address is the same than service address), whether there's an animal on site (It must take care with animals?), and either copy billing into the pool location or enter Pool address, line 2, state, city, and zip. You also set Monthly payment by client, Gate code, Enter side, Chemical type (pool type), and Notes about location for field context.
Next takes you to scheduling.
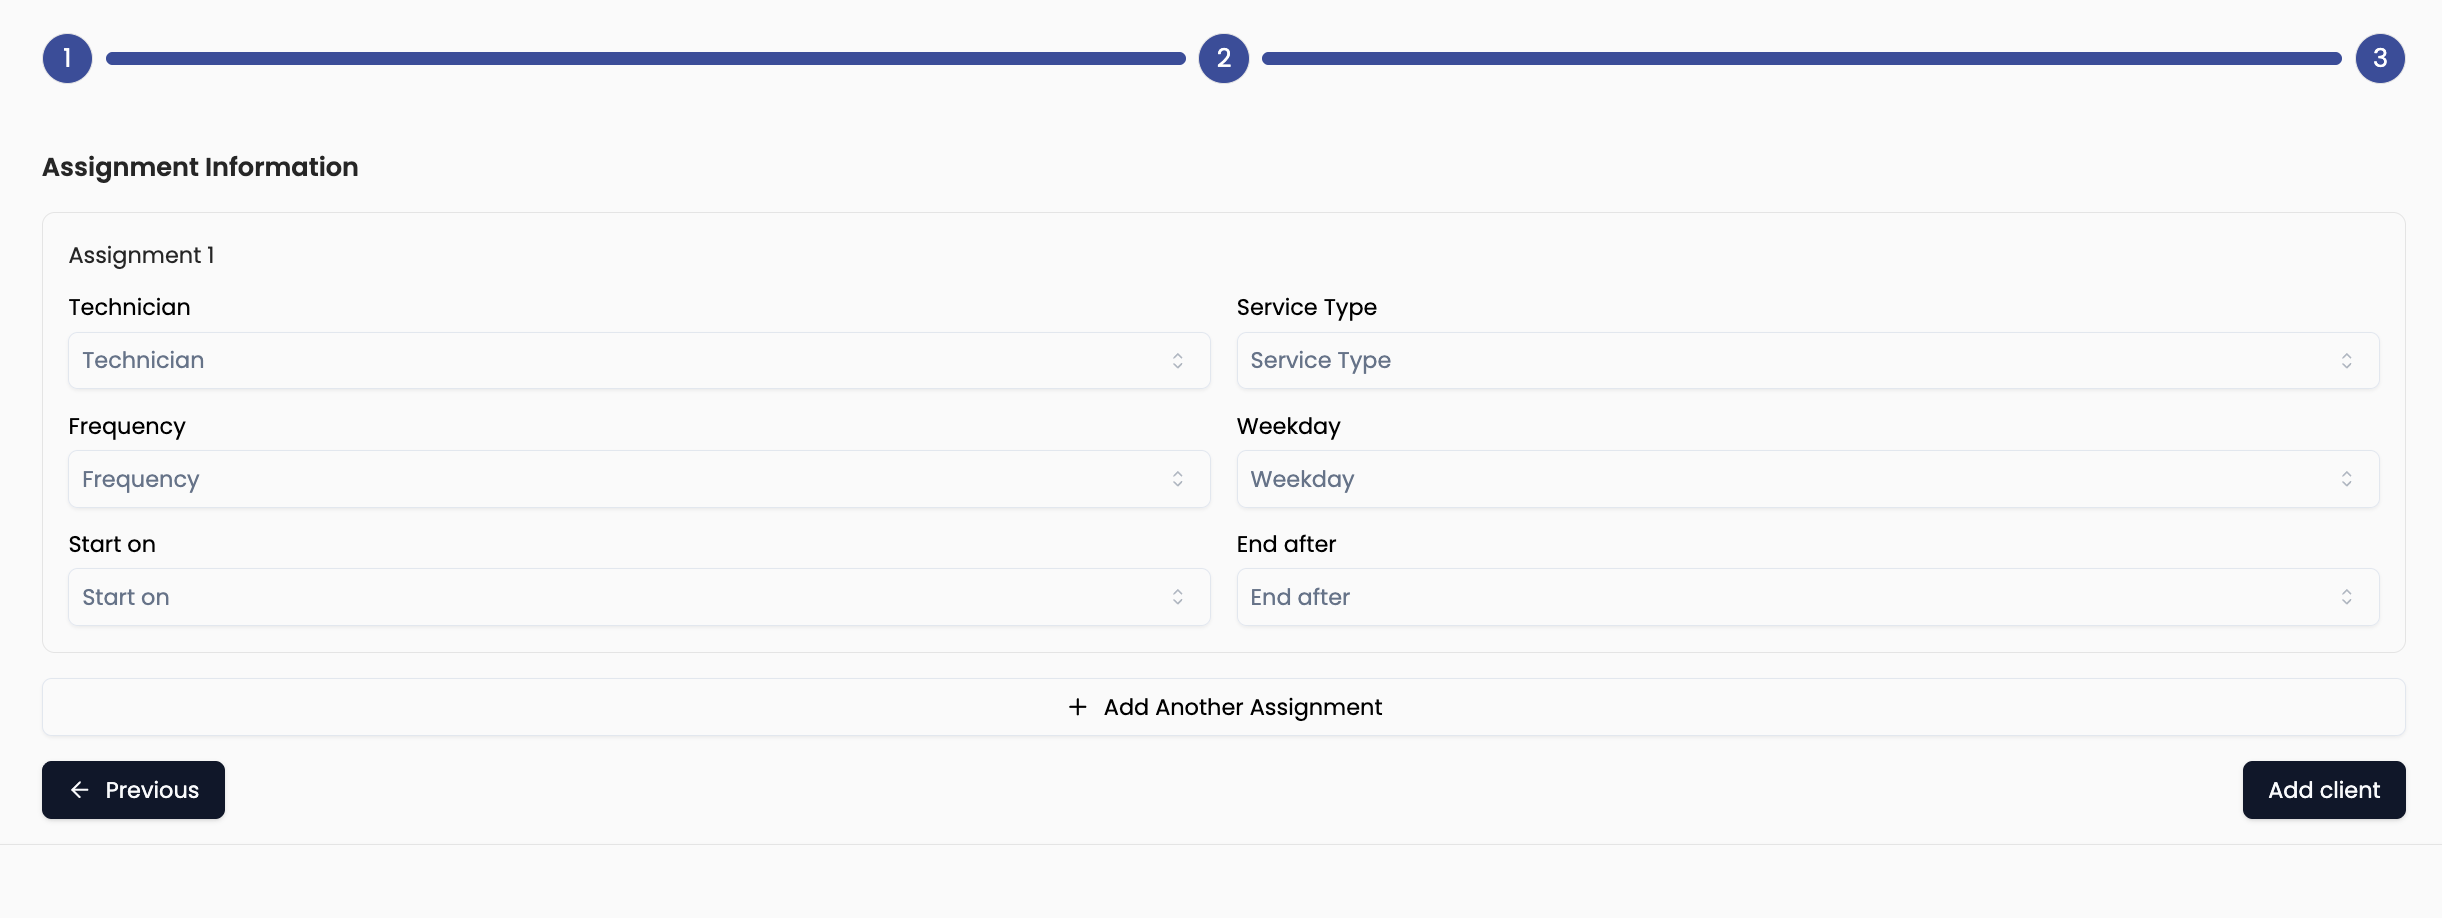
3 — Assignments
Assignment Information is where work becomes real. Use Add Another Assignment when the same pool needs more than one recurring schedule (for example, two visits per week with different technicians, or a regular clean plus a separate add-on route).
What each field is for (with quick examples)
- Technician — Who is responsible for this assignment on their route. Example: Alex handles this stop every Tuesday; Jordan handles the second weekly visit on Fridays.
- Service Type — The service line your company defined (e.g. Pool cleaning, Fire up, Maintenance). It controls how the job is billed and what the tech is expected to do. Example: pick Pool cleaning for standard pool service.
- Frequency — How often this assignment repeats. Options are below. Once — One visit only, no repeat: you pick a Scheduled Date (for one-offs, trials, openings, or any job that will not recur). Weekly — One visit every week on the Weekday you choose (e.g. every Tuesday)—the standard once-a-week pool on a single assignment. Biweekly — One visit every two weeks on the same weekday—lighter plans, budget service, or biweekly chemistry checks. Monthly — About one visit per month on the pattern your app uses—inspections, specialty visits, or rare full-service cadence (less common than weekly for pool cleaning).
- Weekday — Which day of the week this assignment lands on (when frequency is recurring). Example: Tuesday for the first weekly visit.
- Start on — The first date Aquatechy should schedule from (often “this week” or the customer’s go-live date). Example: start April 1 when the customer’s season begins.
- End after — When to stop generating future visits (optional in many workflows—use a season end, contract end, or leave open if service continues indefinitely). Example: October 15 for a seasonal contract end.
Example A — One pool, once a week, one technician
A residential pool with weekly service by a single tech:
- Assignment 1: Technician Alex · Service Type Pool cleaning · Frequency WEEKLY · Weekday Tuesday · Start on next available Tuesday · End after end of season or leave per your office rules.
You do not need Assignment 2 unless the customer buys a second day or a second service type.
Example B — Same pool, twice a week, different technicians
Some companies split two weekly visits across two techs (routes, capacity, or customer preference). Create two assignments for the same pool:
- Assignment 1: Technician Alex · Pool cleaning · Frequency WEEKLY · Weekday Tuesday · start/end as needed.
- Assignment 2: Technician Jordan · Pool cleaning (or the same type) · Frequency WEEKLY · Weekday Friday · same Start on / End after as Assignment 1.
Each assignment is its own weekly loop: Tuesday with Alex, Friday with Jordan. Together that’s two visits per week on different routes.
Example C — Same pool, twice a week, same technician
If one tech does both visits in the same week, you can still use two assignments (e.g. Tuesday + Friday both assigned to Alex), or your app may allow two weekdays under one assignment—use whichever matches what you see in the form.
When everything looks right, Add client saves the client, pool, and assignments together.