Aquatechy can e-mail customers after work is done (and in a few other cases). This guide covers where to turn sending on, how to edit templates, what each include option does, skipped-service notices, and your logo in the message.
The rule that trips people up: two layers have to agree
Aquatechy tells you in the app: service e-mails only go out when both the company side and the client side allow it.
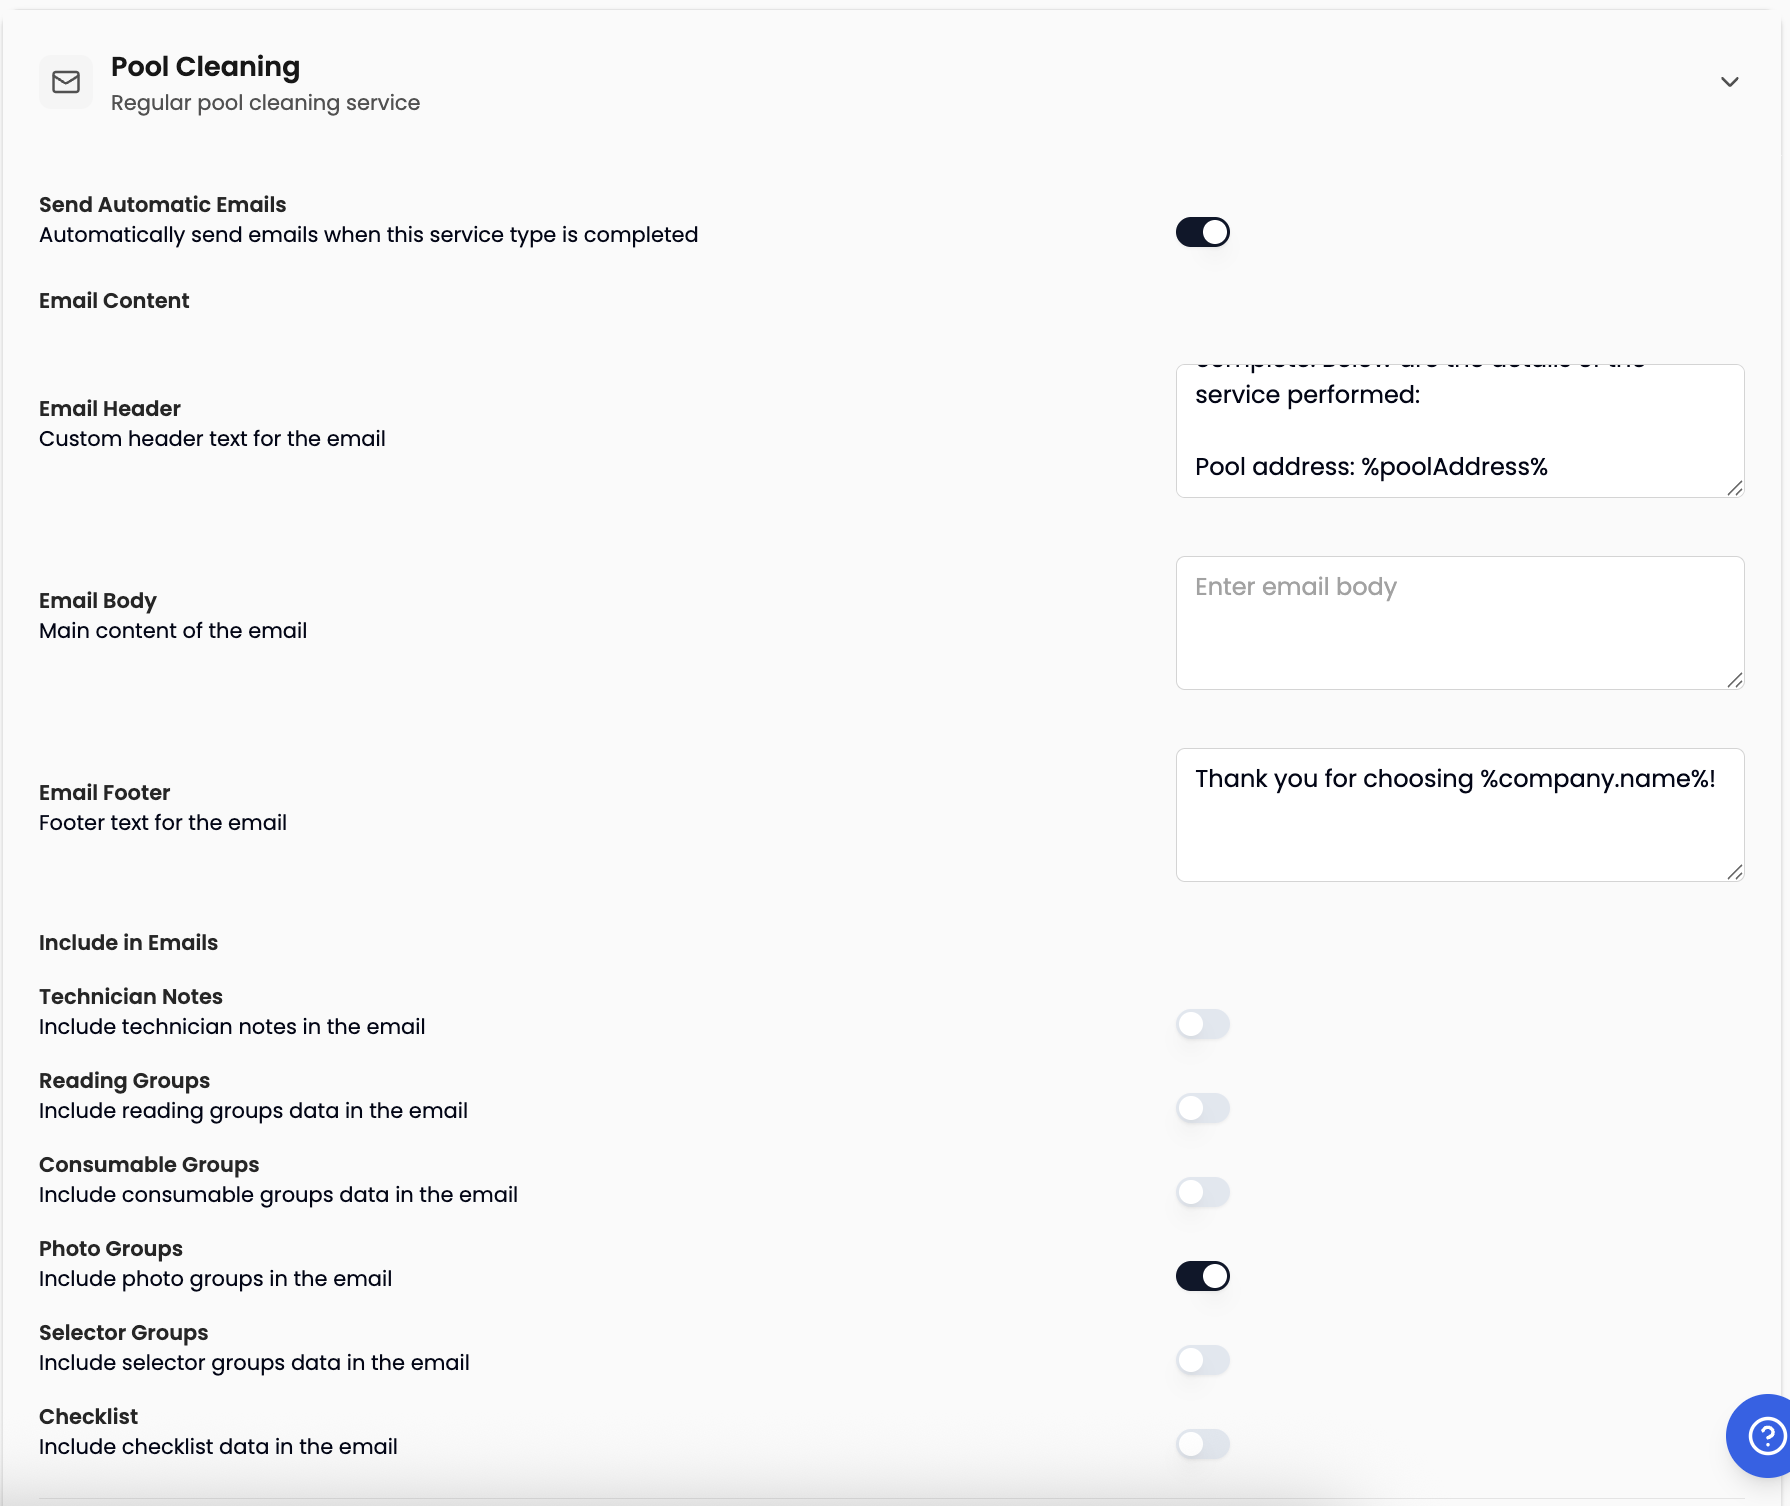
- Company (per service type): Go to Settings → Companies → open the company → Preferences → expand Email Notifications. For each service type (e.g. Pool Cleaning), turn on Send Automatic Emails and choose what to Include in Emails (reading groups, consumables, selectors, checklist, photos, technician notes). If Send Automatic Emails is off for that type, the system will not send messages when those jobs complete.
- Client: Open the client → Preferences tab. Turn on Send service e-mails and, under Include in service e-mails, turn on the same kinds of content you want that household to receive.
If either side turns off the main send option or a specific include (e.g. checklist on the client but not on the company side), the customer may not get that section—or may not get mail at all, depending on how your toggles line up. When you save client preferences, the confirmation text repeats the idea: client preferences and company preferences must both be enabled for service and filter-cleaning e-mails.
Filter cleaning is separate: on the company side, Filter Maintenance has Send filter cleaning e-mails; on the client, Send filter cleaning e-mails lives under Filter cleaning notifications. Again, both need to allow it.
Plan: E-mail features are tied to the Grow plan in the product (you’ll see a notice if you’re on Free).
Where to edit templates (company)
Settings → Companies → your company → Preferences → Email Notifications (expand the section).
For each service type:
- Send Automatic Emails — Automatically send emails when this service type is completed.
- Email Content — Email Header, Email Body, and Email Footer (custom header, main content, footer).
- Include in Emails — toggles for Technician Notes, Reading Groups, Consumable Groups, Photo Groups, Selector Groups, and Checklist (Include … in the email).
Click Save {Service Type} Preferences at the bottom of that service type’s section.
What each “include” option means for the customer
These control what gets pulled from the completed service and shown in the e-mail. If the tech leaves something blank or doesn’t record it, there is nothing to send for that part—even if the toggle is on.
Checklist
Checklist sends the checklist items the technician marked on the service. Items not checked in the app are not sent to the customer—only what was actually completed shows in that block.
Consumables (Consumable Groups on the company screen)
Consumables covers chemicals and consumables the technician logs for that visit (your company sets up consumable groups under Service Configuration). If the tech does not record a consumable, nothing is sent for that line.
Readings (Reading Groups)
Readings sends the water readings the technician enters (e.g. chlorine, pH, alkalinity—whatever your reading groups define). Whatever is not entered in the app won’t appear in the e-mail.
Selectors (Selector Groups)
Selectors are custom questions with predefined answers your company sets up (for example a multiple-choice field the tech taps on site). Those answers can appear in the customer e-mail when Selector Groups is on for both company and client.
Example: Question “How is the water level?” with answers like “Water level ok”, “Water level low”—the client sees whichever option the tech selected.
To build selector groups, definitions, and options, use the same company Preferences page: Service Configuration → tab Selectors.
Photos (Photo Groups)
With Photo Groups on, service photos that belong to your configured photo groups can be included—only what was actually added on the service counts.
Technician notes
When Technician Notes is on, notes the tech leaves on the service can be included in the outgoing mail.
Email configuration: CC and skipped services
Still under Preferences, inside Email Notifications, open Email Configuration:
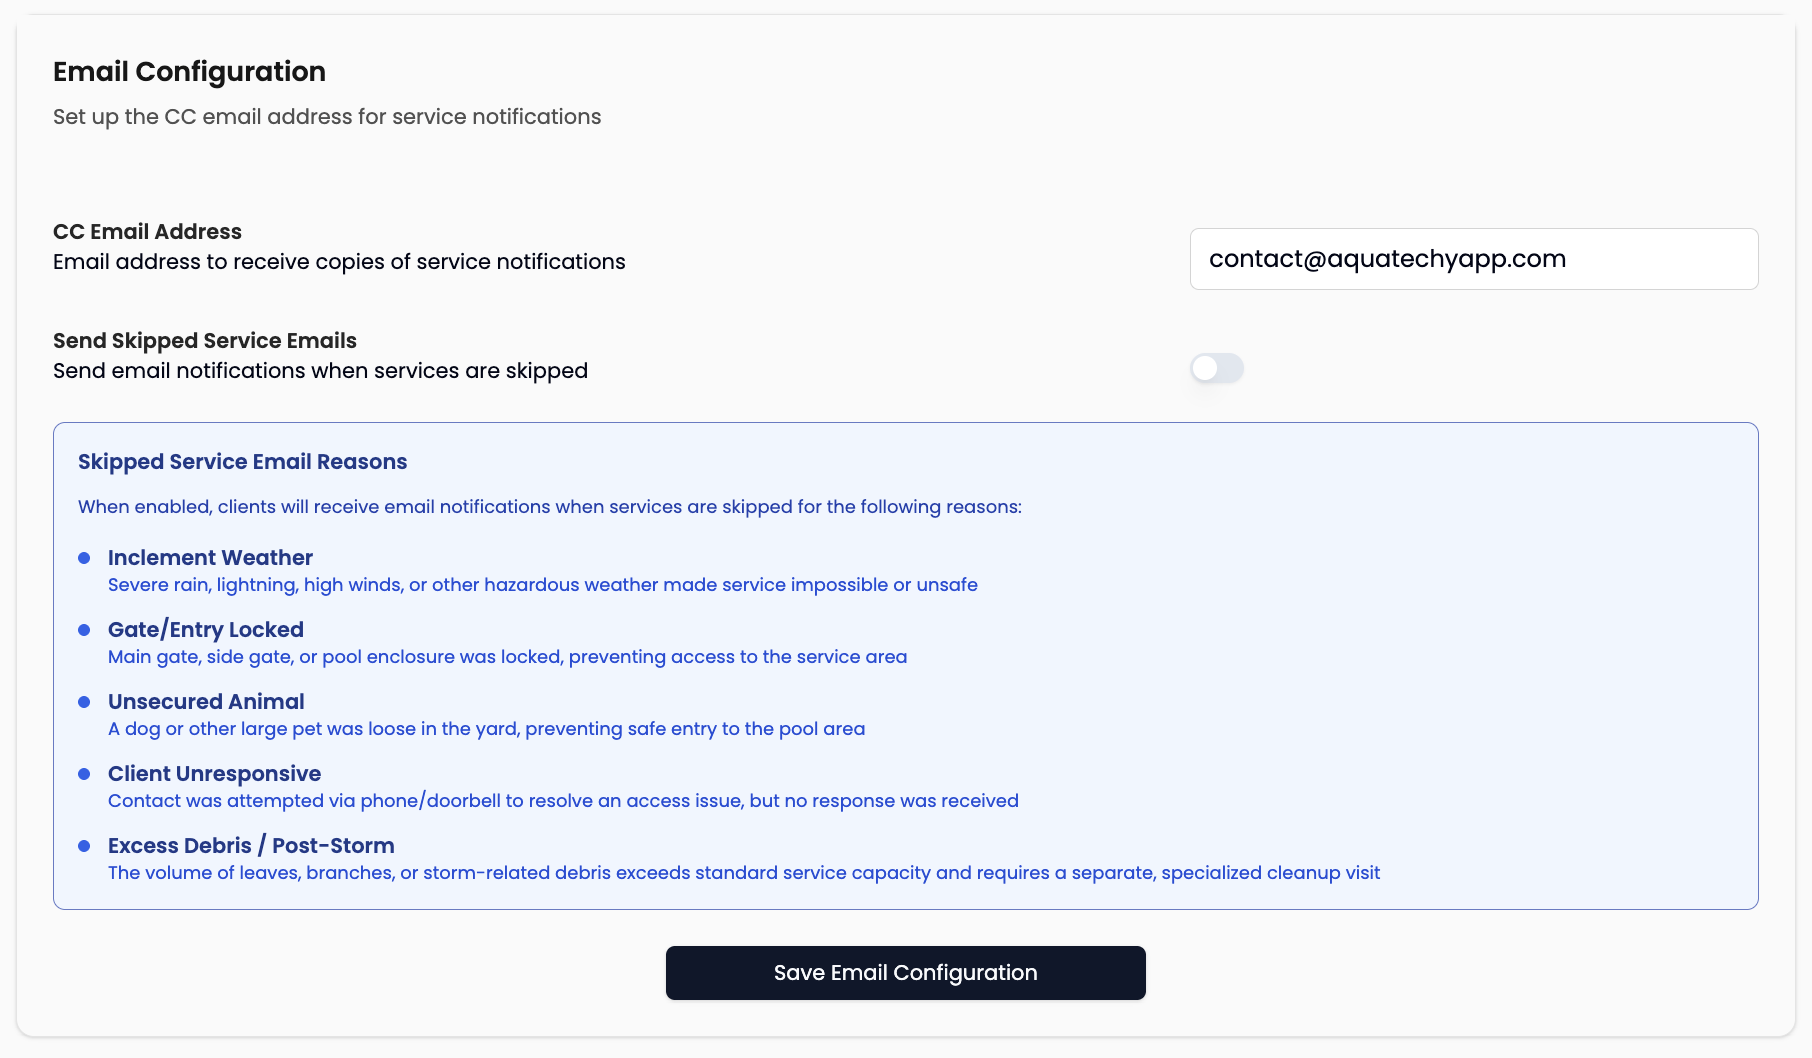
- CC Email Address — Email address to receive copies of service notifications (internal copy, not the customer’s inbox).
- Send Skipped Service Emails — Send email notifications when services are skipped.
When Send Skipped Service Emails is on, the UI lists Skipped Service Email Reasons clients may be notified about, including:
- Inclement Weather — conditions made service unsafe or impossible.
- Gate/Entry Locked — no access to the pool area.
- Unsecured Animal — loose pet prevented safe entry.
- Client Unresponsive — couldn’t resolve access after trying to reach the client.
- Excess Debris / Post-Storm — debris beyond a normal stop; may need a separate cleanup visit.
Use Save Email Configuration to store CC and skipped-mail settings.
Client-side preferences (per customer)
Clients → open the client → Preferences tab.
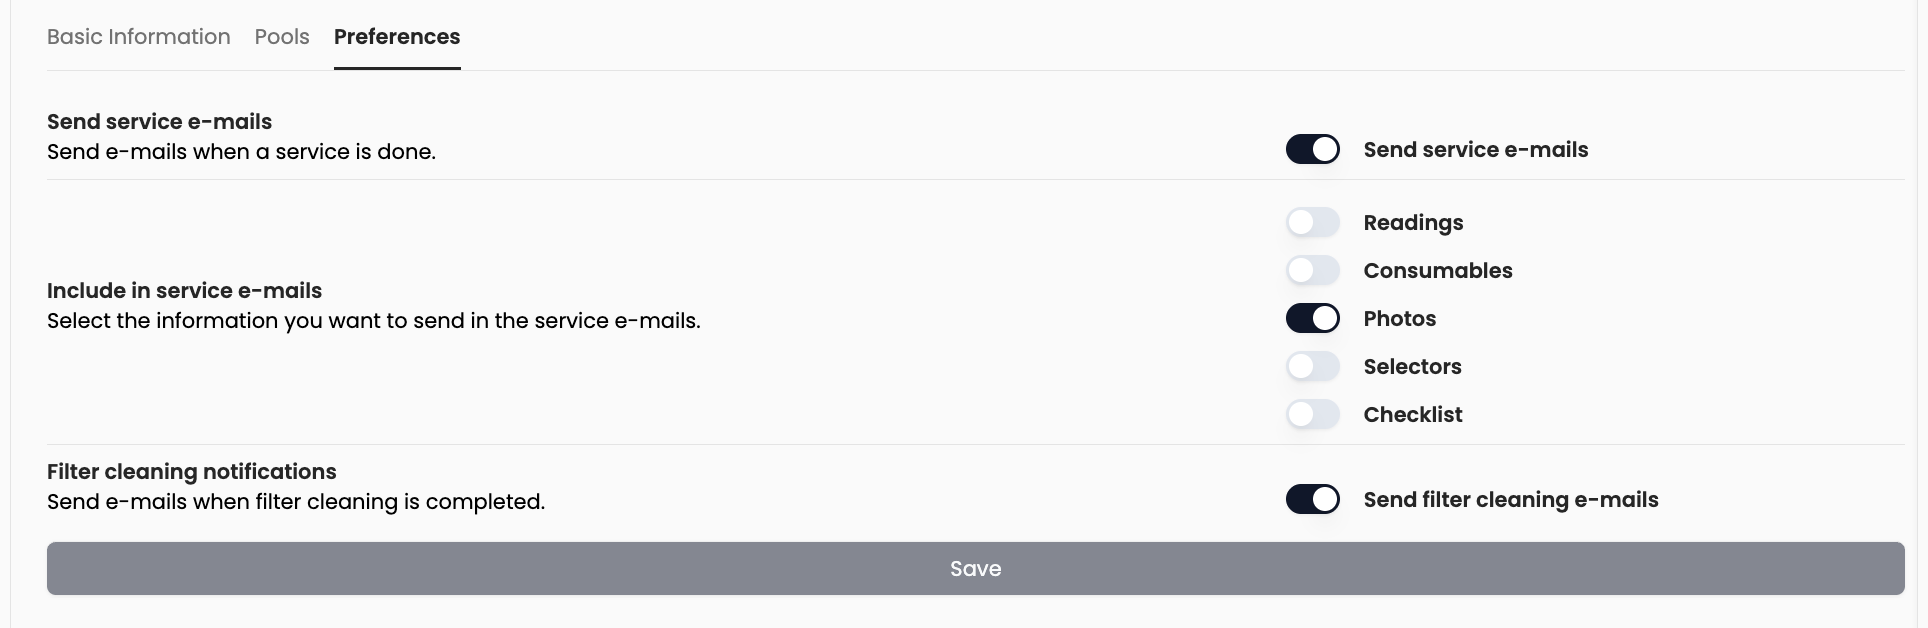
- Send service e-mails — main switch for e-mails when a service is done.
- Include in service e-mails — Readings, Consumables, Photos, Selectors, Checklist (labels match the client screen).
- Filter cleaning notifications — Send filter cleaning e-mails when filter work is completed.
Save runs Update Email Preferences, which again reminds you that client and company must both allow sending.
To change many clients at once, go to Clients → Bulk Actions (/clients/bulk-actions) and use the same preference columns there.
Logo in the e-mail
Customer-facing messages use your company logo when one is set.
![]()
- Go to Settings → Companies → open the company.
- In the left profile card (company name and address), click Change logo—it’s there whether you’re on Basic Information, Preferences, or Team (Owners, Admins, and Office can edit).
- Pick an image; adjust Zoom if needed, then Update Logo (or Cancel to close without saving).
After it saves, new e-mails should show that branding.
Quick checklist before testing
- Grow plan active (if your account requires it).
- Company Preferences → Email Notifications: Send Automatic Emails on for the service type you’re testing; Include in Emails matches what you want to show.
- Client Preferences: Send service e-mails on; matching include toggles on.
- Tech completes a service with real readings, consumables, checklist checks, selectors, and/or photos if you expect those blocks to appear.
- Optional: Send Skipped Service Emails and CC saved under Email Configuration.